Every blogger or creator problem to get Copyright free images. And always in starting everyone uses images from google which is the biggest mistake. If somehow anyone manages to get images then they will not do Image optimization which is again not good for SEO.
We will let you know about Create free image for blog posts. But we recommend that you can manage to get a Premium source of image and image creation. which will help you a lot save time and better results in SEO.
How to Creating free image for blog posts
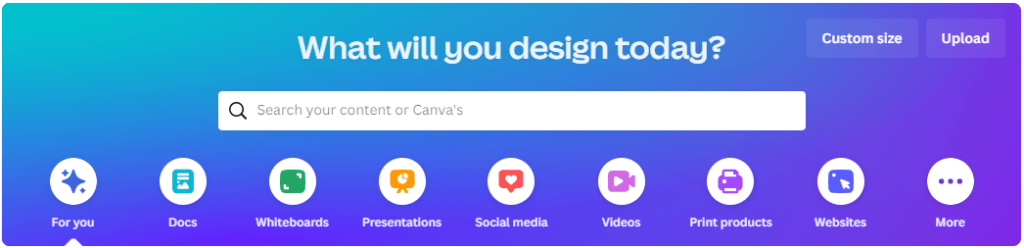
In starting we used the Free Version of Canva to Create free image for blog posts and Images for Instagram. You can see our images are very much unique. Not only Blog images you can create different images for Instagram, infographics, videos, and many more you can see the below image.
Below are some steps that we have used to create the best image for our blog with Canva.
- Go to the Canva website and sign up for an account. You can use your Google, Facebook, or email to create an account.
- Dashboard>>Home >>Templates Select a template that you think is good or select based on which type of image and for what you are creating.
- A window will pop up with a list of Templates you can select one of them and then click on Customize this Template.
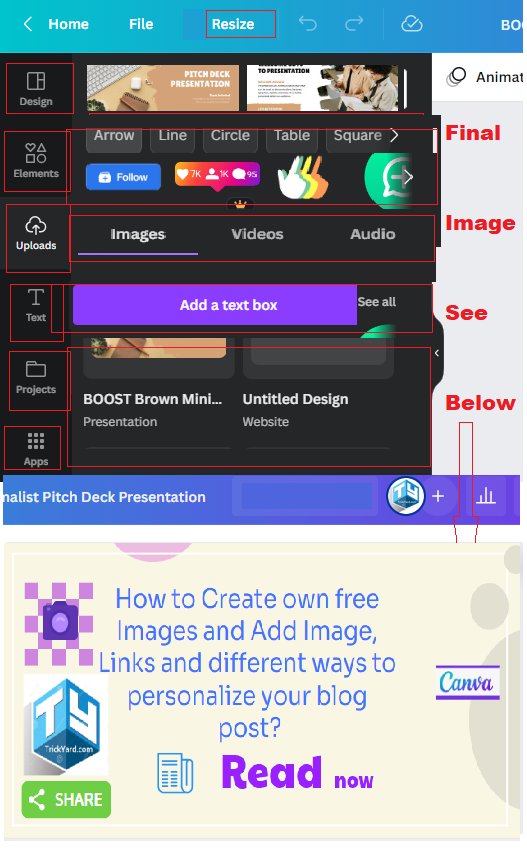
- You will be taken to the Canva editor,
- On the left side of the editor, you will see a panel with various design elements such as text, shapes, and images. You can use these elements to create your image.
- You can use these elements just drag and drop on the template. Also, you can Upload Images to it and use them in your template too.
- If you have Premium Canva you can use resize, and create projects. if do not have you can use a trick for it. ( Open the Windows Snip tool take a snippet and save it as PNG or the required Image format.)
- When you are finished creating your image, you can download it by clicking on the “Download” button in the top right corner of the editor. You can choose to download the image as a PNG, JPG, or PDF file.
That’s all to create an image by Canva.
Why use the Canva Premium version Design free visuals for blog posts
There are many benefits to using Canva and more to using Canva Premium Version. As described in this post below. after reading these points about canva premium version I am sure you will switch to Canva premium version and Design free visuals for blog posts which defiantly increase your ranking in Search engines.
Benefits of Canva Pro
- You can use premium Templates.
- Directly Share images from Canva Account.
- Can Resize images. So you can Say Save much time and Get image Quality like woohoo.
- No Canva Branding, use your own branding on images.
- Access to More Free stock Photos. So your design can be the best in the market.
- Access to all Team members and store all your designs in one place use them when you need them.
- Get Contact Support from Canva Team.
Cons of using a Canva Free Version
- Limited Template in the free version.
- You can not share images directly and can not download images also can resize them too. To do so you need to look for alternatives and which leads to lots of time and image quality is not the same as the pro version.
- The limited Stock photo you can Use.
- Very Limited photos you can upload and storage is also very less in the free version.
- No Team Access feature, you need every time share your design manually.
How to Optimize Images for blog posts like resizing or converting images for free?
The next important task is to optimize your image for the blog post. It’s the most important task if you are not doing this you are losing a huge number of traffic. If you use direct copy past image then also you need to do it. So why do you need to do Image optimization and resize and convert images? The answer is below:-
- To reduce Load on Hosting and for Mainly Faster loading of your website Image must be resized.
- Convert images are also SEO vital because web images are less in size and easier to handle. and defiantly helpful in loading your web page.
- Image optimization Helps a lot in Google search ranking, as you can see there is high traffic from Pinterest which is only an image-based website.
Follow the Below steps to optimize your image for a blog posts or social media sharing.
Step 1. Image resize:-
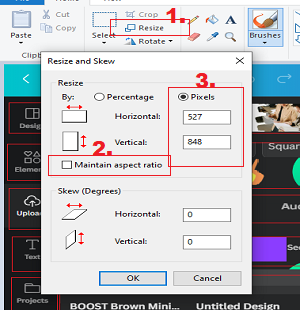
- Right-click on Image and open with Paint( with your own laptop or desktop).
- Click On resize Option.
- Uncheck Maintain Aspect Ratio option.
- Click On Pixels and enter the horizontal and verticle pixels which you required.
- Click on Ok to save it.
This is the best way to resize images because if you do it online the online website adds its property to your image. And its requirements to upload and download so resizing with paint is great also you can Mark images as I did and also write so steps like 1. 2. 3. and Square which is not available on the online website.
You can try www.iloveimg.com, imageresizer.com, etc for resizing images.
Edit Image:- As you See all our images which are edited in Paint only. You can Put Square and Numbering in paint to point out things in your image.

Also, you can use the Windows Sniping tool (press the Windows logo key + Shift + S) then go to the browser and search for the image or logo which you want to add to your Image then click on the Sniping tool and on New than take a screenshot of that area of image than click on Copy icon on sniping tool and now go to Image which is you are editing in paint pest there and adjust pested image and save it. that's all your image is ready.
Note:- Always do resize the image before the compression and Image optimization of the image.
Step 2. Convert Image:-
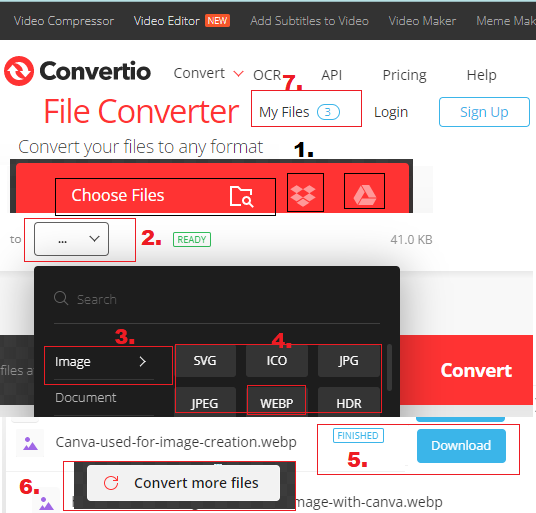
- Go to convertio.co
- Then click on Choose file from your computer, also you can give drop box or drive path address from here.
- From mark 2 on the image, 2. select Image 4. then the type of image type in which you want to convert it like jpg, web,p, or HDR. Good to choose WEBP.it will convert images.
- Click on Download to download the converted image(5.)
- Click on Convert more files to convert other images because free images give only 3 images once.
- Click on my files 7. here you can X-converted images. also, you can download already converted images.
Note:- Free versions have limitations like only 3 images can be converted once. Limited conversion per day. Using the below tricks you can use this website more time.
- After it asks for a sign-up or paid version Open in Incognito mode.
- Also, you can open it in different Browsers.
- You can use VPN or Proxy website to open it for more free conversion.
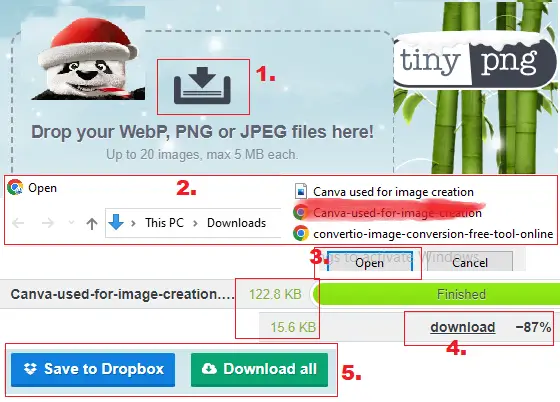
Step 3. Compress Image:-
- Go to tinypng.com then click on Drop your image Here.
- Select the image which you want to compress then Hit Open. It will start Compressing your image.
- Once the image show you are Finished then you can Click on Download image to download it.
- You can select multiple files also can be downloaded and also you can save them to dropbox.
This website is the fastest and most widely used try it once you will thank me later and it’s all free.
It’s a very Important Part to make images ready for blog posts and optimized for SEO. If you are doing such steps you are doing Organickly this will boom your traffic I am sure.
Step 4. Optimize image:-
- Right-click on Image which you want to edit its property.
- Click on General Tab as shown in this image.
- Then you will see the Description in this you can change all the properties like.
- Title, Subject, Ratings, Tag, Comments, and in Bellow there is a description Option you need to put a description also related to your image and topic and add the tags relevant to your blog and image.
- Then click on OK. and it’s done. your image is now ready for Upload on the web.
Note:- If your image General tab Read only Check box is checked then you will not able to edit them. so Check once if you are not able to edit the properties of your image.

Once you followed all the above steps your image is ready to upload on the blog. Below, we will describe how you can upload the images to your blog post.
How to Insert images into blog posts and links and Optimize images while uploading to blog posts.
Every blog post needs to add two types of images in blog post one is a Feature image which will be shown when you share the link anywhere in the preview it will be shown.
Second images are shown to readers when they are reading your blog post. so its very important to add images better way and also need optimize while uploading to the web.

Add feature Image and Optimize it while uploading.
- Log in to your wordpress and go to all posts.
- Select a Post in which you want to add a featured image or a post you are writing.
- There is an Option to click on the Set featured image.
- Select the future image from the local computer or if it’s already uploaded select it from the Media library option.
- Once uploaded there is an option to write Alt Text write it.
- The title will be the image name itself automatically.
- Caption add a caption for the image.
- Description writ about image and tags etc you can include.
- Click on the Set featured image and its set.
- From replace and delete option you can remove the future image.
In the same way, you can edit images in your blog post. It depends on Editor which editor you are using. If you are housing block editor just click on block ad select image type then you can upload the image also you can link the URL too to the Image. so that’s all about personalization and editing images in your post hope you like this post. if still have any questions you can comment will help resolve them ASAP.
Conclusion
Hope you get a better idea now about Building free graphics for blog posts How to optimize them and what is the best way to use them in your blog post. kindly do share and comment if you like this post.